
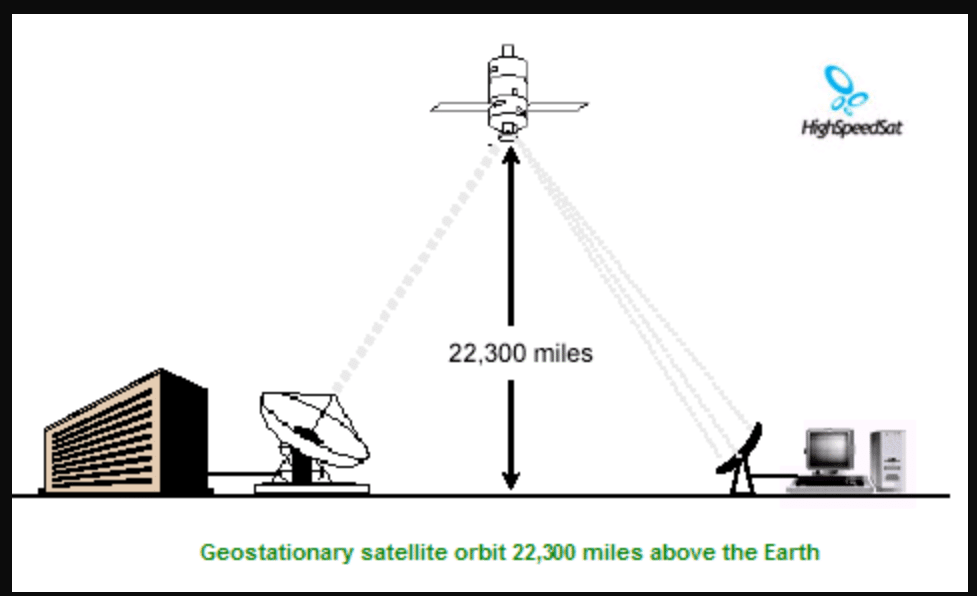


In our modern era, satellites (such as Nilesat, Arabsat, or even satellite internet systems like Starlink) have become a primary source for digital tv and high-speed internet. However, many users frequently complain about weak signals or frequent interruptions, resulting in blurry images or connection drops. The good news is that most of these problems can be solved by following simple and practical tips. In this article, we will review the most important practical steps to obtain a strong and steady signal at all times.
1. Choosing the Ideal Location for the Dish
The first and most important step is selecting a location with a sharp, unobstructed line of sight toward the target satellite.
- Avoid large trees, tall buildings, poles, or even nearby walls.
- In urban areas like Cairo or Giza, try to mount the antenna on the roof or use poles with appropriate height (at least 3-5 meters).
- Use mobile apps such as “Dish Pointer” or “Satellite Finder” to determine the exact direction (azimuth and elevation) of the satellite.
2. High-Quality Dish and Mount Installation
A antenna that shakes with the slightest wind will never provide a steady signal.
- Choose a heavy-duty steel mount and secure it firmly to the roof using screws and cement if necessary.
- Ensure the antenna is perfectly level and not tilted.
- In areas exposed to strong winds (such as coastal or desert regions), use additional supports or tension wires to stabilize the antenna.
3. Precise Dish Alignment (Pointing)
This is the step where most people fail:
- Determine the satellite angles accurately (Elevation, Azimuth, and Skew).
- Start with approximate pointing using a compass, then use a satellite signal meter or the device’s built-in signal indicator.
- Move the antenna very slowly (only millimeters at a time) until the signal clarity reaches at least 80-90%, then tighten the bolts securely.
- Golden tip: If you are a beginner, hire a professional technician, as the difference between 70% and 95% signal means complete stability.
4. Choosing High-Quality Equipment
- LNB (Head): Select a high-clarity LNB (Single, Universal, or Octo depending on your needs) with a low noise figure (0.1-0.3 dB).
- Cable: Use high-clarity RG-6 or RG-11 coaxial wire, and do not exceed 30 meters in length unless necessary (in which case, use a signal amplifier).
- device: Make sure the device supports strong signals and has the latest firmware updates.
5. Checking Cables and Connections
- Inspect all connections and ensure they are tight and not corroded.
- Use insulating tape or rubber covers to protect the connections from water and moisture.
- If the wire length is long, setup a signal amplifier near the device.
6. Regular Maintenance
- Clean the antenna from dust, bird droppings, or leaves every 3-6 months.
- Check for rust or damage in the mount or LNB.
- In winter, ensure no water freezes on the antenna (consider installing a protective cover).
- Re-align the antenna once a year, especially after strong storms.
7. Dealing with Weather Factors
- Heavy Rain (Rain Fade): Choose a high-clarity LNB and a larger antenna diameter (90-120 cm) to minimize the effect.
- Extreme Heat: Avoid exposing the LNB to direct sunlight for long periods.
- Snow or Sand: In affected areas, setup a transparent antenna cover.


